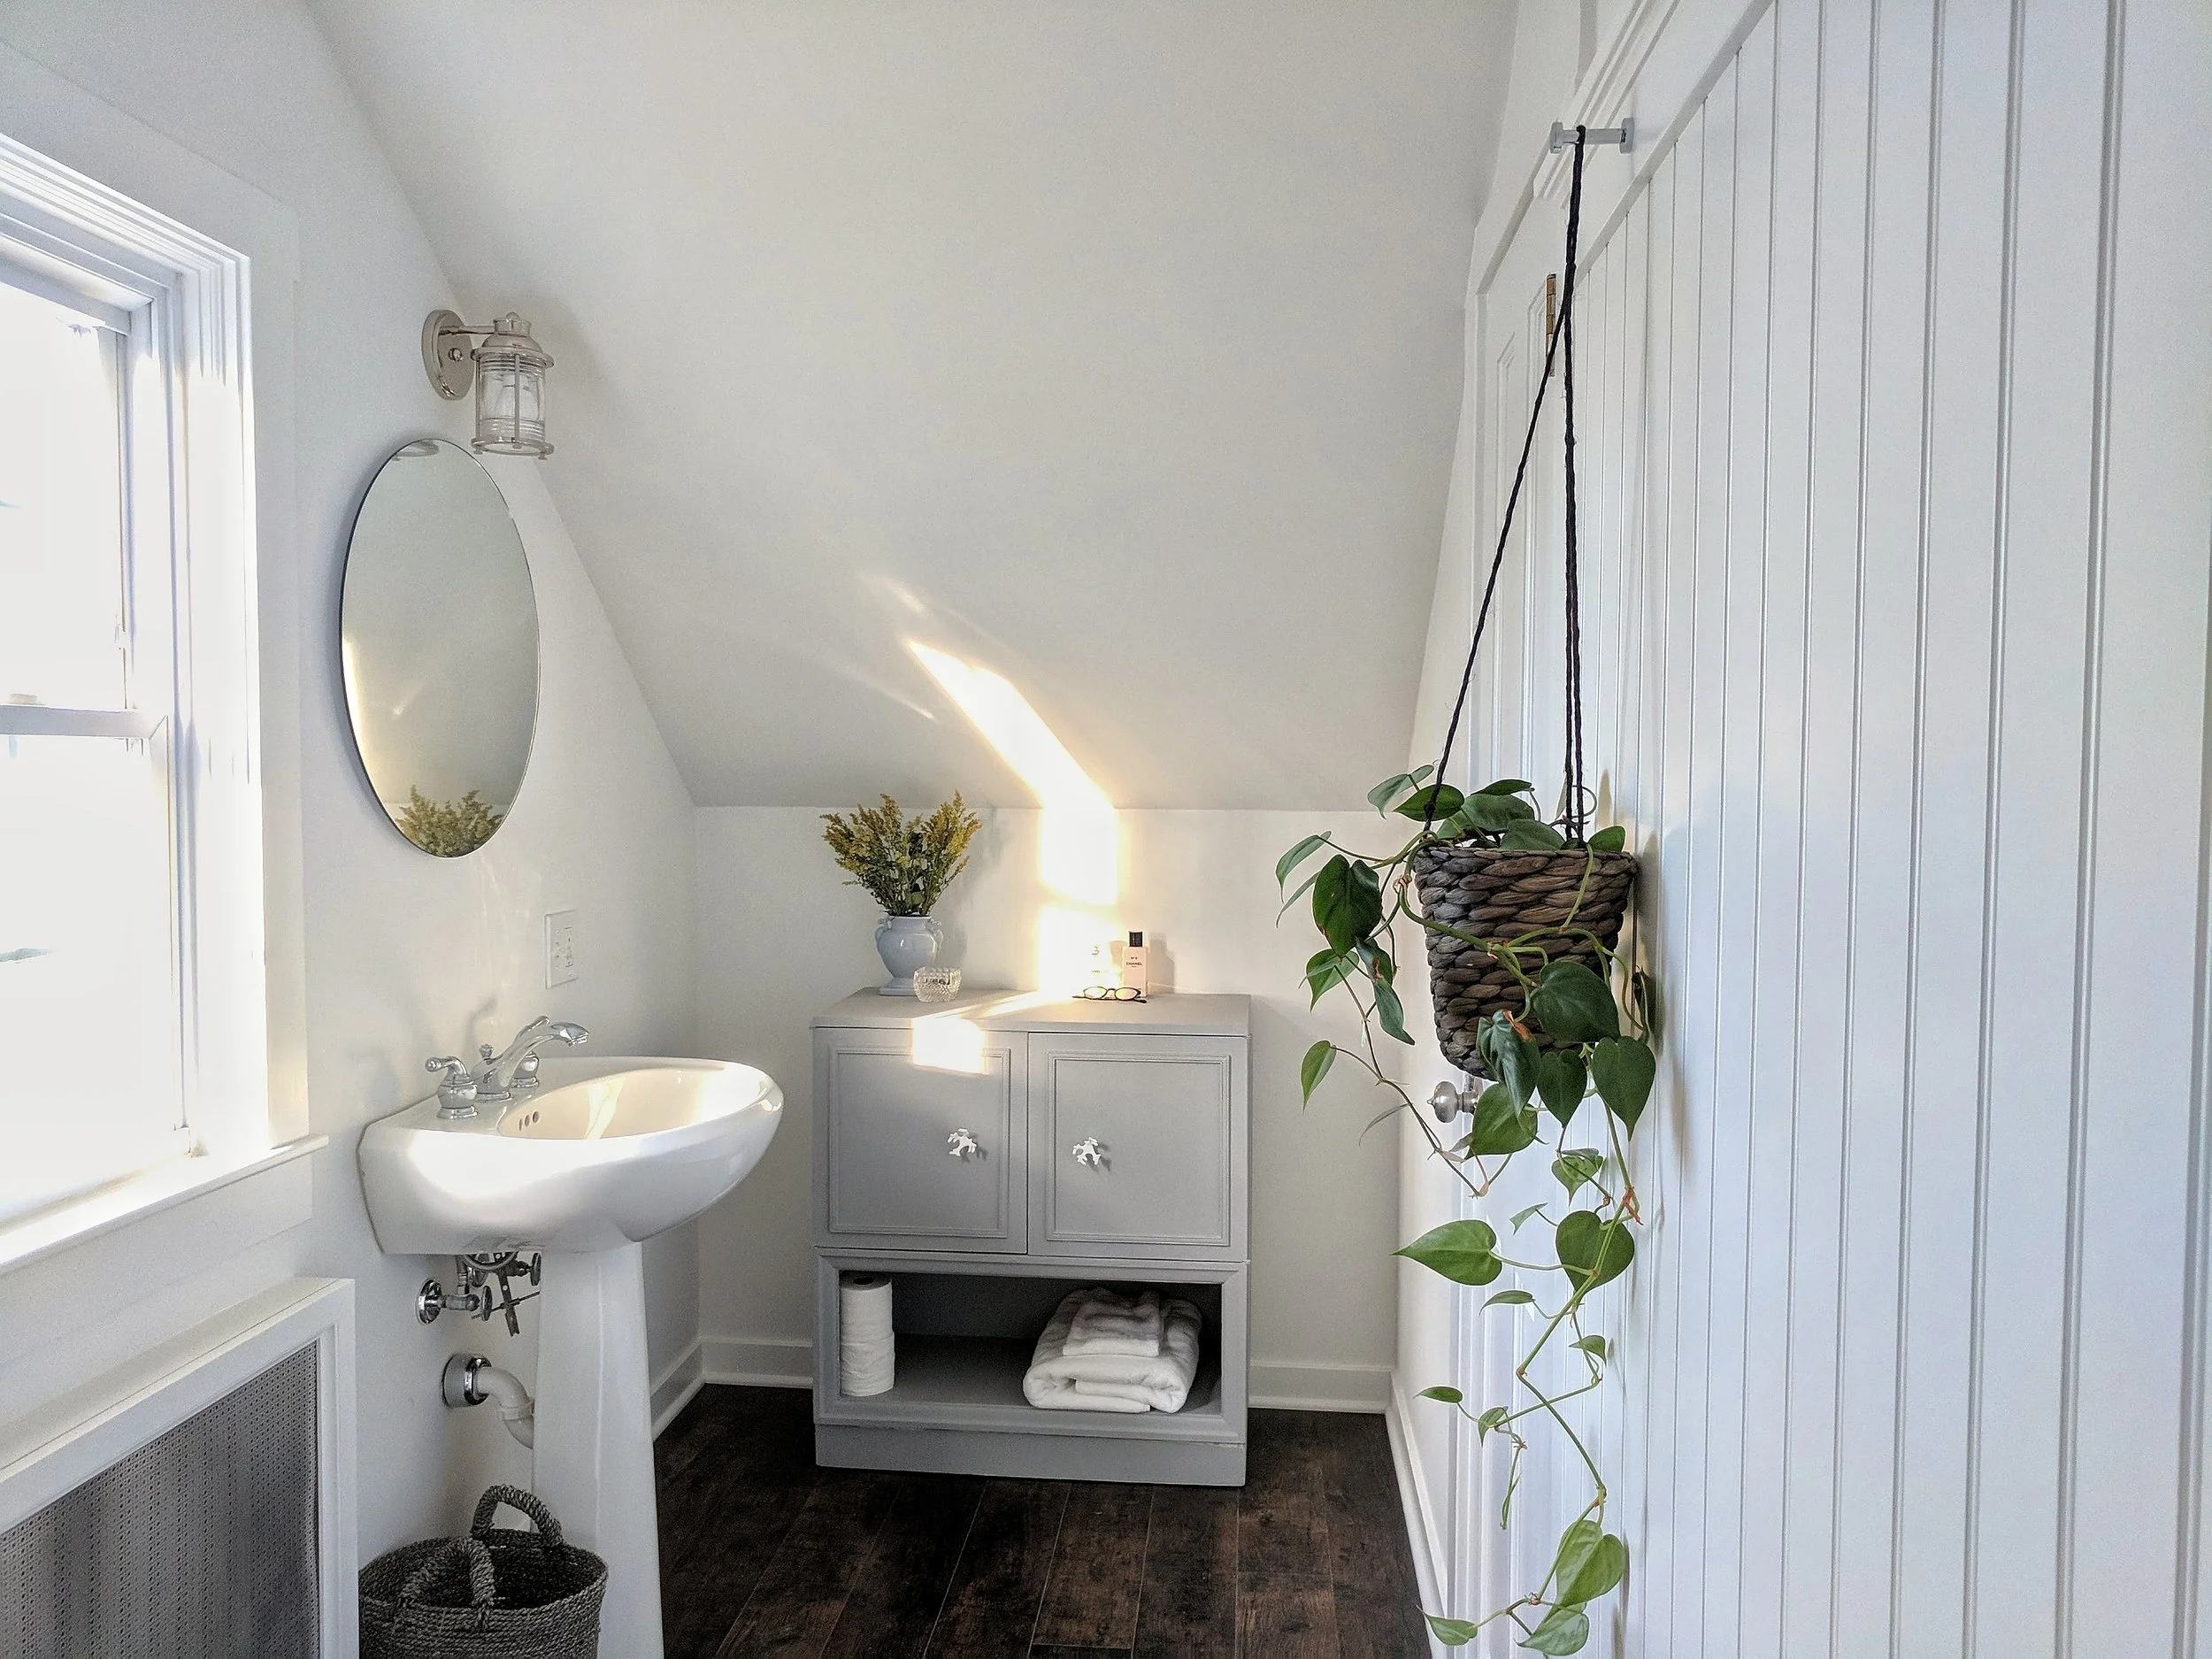
ONE ROOM CHALLENGE (Week One): Annex Guest Room Makeover

Twice a year, in October and April, Linda from

Calling It Home

 and

House Beautiful

hosts a One Room Challenge. Over the course of 6 weeks, 20 select designers and bloggers tackle renovating or redecorating a specific room, and share their

 progress with weekly blog posts. 

When the April 2017 list of selected designers was announces, I was so inspired by how many of the participants are blogs and designers I admire. I knew I wanted to participate too!

The One Room Challenge encourages Guest Participants, so I'm joining the fun, sharing the magic of an Annex Guest Room makeover we have yet to tackle.

What's even more exciting, is this is a linked event, which means that all the Guest Participants will share a common link and you'll be able to easily surf through a ton of room transformations. You'll find that link at the bottom of this post!

Warning: The following "before" images are scary!

I often share this 'before' image with people who don't know the

state in which we acquired Content

.

I suppose this

Annex Guest Room

image was taken during the bank's repossession of the property prior to foreclosure.

Luckily, when we closed on Content in October 2014, the trash and junk had been cleaned out.

But, it always amazes me that just 5 short months after this picture was take, two knuckle heads (John + I) showed up bright-eyed and bushy tailed, and jumped feet first into the biggest renovation project of our lives.

Even though we've done a lot since 2014 (i.e. the blood, sweat and tears chronicled throughout this blog), nowadays the Annex Guest Room has mostly been used as storage.

Here's John and my Dad, likely discussing how I'm a closet hoarder of second-hand furniture. 

Over the coldest winter months, I did spend a few days replacing all of the window weight mechanics so all the windows now properly function.

People often ask, "How long will Content's renovation take?" Our honest answer is - forever! And that answer is said with love. We love working on old houses (ours + our home consulting clients) they're just needy! . We promised early on to approach every project with the motto "do it right the first time". . And this weekend we were reminded of that motto when a simple paint job required us to first pull off all the window casing to fix the double hung weights. We're pros at window weights these days!

A post shared by c o n t e n t + c o (@contentandcompany) on Feb 6, 2017 at 5:28am PST

Overall, the Annex Guest Room has awesome bones, just like the rest of the house. This space features a brick fireplace (which needs a mantel), exposed beam ceiling and four original, double pane windows.

The original wide, hardwood pine floors are still in this room. And the space has beautiful ceiling and baseboard molding too!

The overall goal of this makeover is to clean up the walls and ceilings with fresh paint, and create a "disappearing" guest room. Huh?

Stay with me... We refer to this as the Annex because it attaches to Guest Suite #1 and the Great Room. We think this would be the perfect space to provide friends and family, traveling together, with additional accommodations.

But we want to reserve the ability to remove the beds should the space be needed for a special event, in conjunction with the Great Room.

So far, I have a vintage camp theme in mind. I think this will lend itself well to the "disappearing" beds, as well as to a lounge setting.

I have a bunch of ideas floating around, and can't wait to see this fun, quirky makeover come to life.

Be sure to follow along with our progress and comment below with your thoughts!

KEEP IT GOING!

You can connect to all the

One Room Challenge Guest Participant week 1

updates here! #oneroomchallenge

(function(i,s,o,g,r,a,m){i['GoogleAnalyticsObject']=r;i[r]=i[r]||function(){ (i[r].q=i[r].q||[]).push(arguments)},i[r].l=1*new Date();a=s.createElement(o), m=s.getElementsByTagName(o)[0];a.async=1;a.src=g;m.parentNode.insertBefore(a,m) })(window,document,'script','//www.google-analytics.com/analytics.js','ga'); ga('create', 'UA-57452507-1', 'auto'); ga('send', 'pageview');

RENOVATION: Master Bedroom (Phase 1)

In an effort to sustain our home renovating energy and enthusiasm, (and not go instantly insane) we have been focusing on projects within Content that will immediately benefit John and I. For instance, completing the master bedroom and en suite bathroom. Like every floor plan we've encountered within this house, thus far, the layout of the master bedroom is challenging.

It's weird though, sometimes I forget just how absurd of a property Content. really is. So often, John and I are busy micro managing projects, making sure we're making forward progress, that the big picture of the house gets lost. It's only when a new visitor or contractor stops by that we're reminded just how different Content. actually is. Our favorite question, "What is this place?"

The real BIG picture!

During a recent visit with our friends Veronica & Shawn, we pointed out that one of the two fireplaces (yes, two in the same room) located on opposing ends of the master bedroom would soon be concealed in the new walk-in closet and only used as an architectural detail. Veronica's reaction was priceless, "Two fireplaces in the same room? Now you're just showing off." Not on purpose of course, but yes, this house has charming quirks and a zillion stories to tell and we're having a blast figuring them all out.

Likely, Content's rooms were once half the size, and each of the bedroom fireplaces were originally in separate rooms. These small rooms are rumored to once have been used by ladies-of-the-night and gentleman callers (more to come on that in later posts). The house is also rumored to have been a horse stable, but either way, I guess a fireplace and a small private room work for both enterprises.

But now, as the newest owners, we are left puzzled and dumbfounded by how to layout the simplest of room elements, like our bed. And because the house was vacant for over 2 years, we can't even copy the prior owners attempts.

Take a look at the original layout of the master bedroom and some of the odd elements we have to quickly address:

  • Two fireplaces

  • Railroad style layout connecting kitchen, master and bathroom

  • One full wall of windows

  • Two exterior (courtyard) access doors

  • Window in closet

Before: Master Bedroom

This is the MLS listing photo of the bedroom before we even owned the house.

See, I'm not exaggerating! The layout is perplexing to say the least, and not in a fun "oh lets stretch our design creativity" kinda way....

Architect, what's that? We just hand draw our plans.

You should see what we submitted to the town for our permits. Ha!

The result of all this master planning (i.e. doodles on a cocktail napkin) was the construction of a mid-room partition that will serve as our headboard and the main wall of our closet. This new addition will nicely position our bed within the room, facing the fireplace. Ohh, how romantical!? 

Before: Master Bedroom

Old closet is out exposing two exterior courtyard doors. The door on the left will be covered up.

Partition wall (view facing bathroom)

Partition wall (view facing kitchen)

As I've said before, we are

extremely

fortunate to be surrounded by talented tradesman that willingly volunteer their time and energy to help us with Content. And in the case of the master bedroom and bathroom, John's father Dave was our saving grace.

Dave traveled from John's home town in Bristol, Connecticut for the weekend to help run all the rough electrical and install recess lighting. Thanks Dave, we couldn't have done it without you!

John, and his father Dave.

That's Phase 1 of the Master. More to come soon!

Demoed.

We knew the second we saw Content. that we had to buy it.  The day we went house shopping, with our realtor Jennifer, was the hottest, most humid day of the summer. And I admit, by the end of the grueling day, we were probably dehydrated and delirious, but nevertheless Content. was a beautiful, quenching spring in a desert of highly priced, badly renovated homes.

But even with all that initial rose colored glory fogging my reality, its was hard to picture some of the rooms in any other light than the way I'd first met them. Specifically, I fell in love with Content. and quickly developed a strong, deep seeded hatred for the kitchen.

Based on an design article I read explaining how the color red brings out aggression and hostile emotions, I blame this hatred fully on the red, painted fireplace sitting smack dab in the middle of the room.

Why would someone paint beautiful, century old brick fire engine red? What was that odd, triangle stainless steel corner piece, and why on earth did it require power? Why couldn't you have installed the hardwood first and then installed the cabinets?

There were so many unanswered kitchen mysteries adding to my loathing and the only answer I could find was to jumped right in, and demo the whole damn thing. But even with all that red hatred coursing through me, I started to get sentimental. It's interesting to imagine what the prior tenants, who I assume put lots of thought and money in to its original construction, would have thought of us swinging sledge hammers without abandon, mocking their color choices and hacksawing the crap out of their once enjoyed kitchen. Did their kids learn to crawl on these floors? How many wonderful Thanksgiving dinners were prepared here?

I felt bad, but nevertheless, the old, dirty country cabinets were removed, along with the oddly shaped stainless steel corner piece that we still can't identify and we turn a page in our own book.

Ironically, as you'll see in these pictures, the fireplace is still there, and it's still very red. Apparently removing paint from brick requires taking a leave of absence from your job,dedicating a solid month to the project and a prescription for Valium. Ever heard of soy gel, yeah, me neither.

Before demo (see the weird stainless corner triangle with power)

After demo (fireplace, still red)